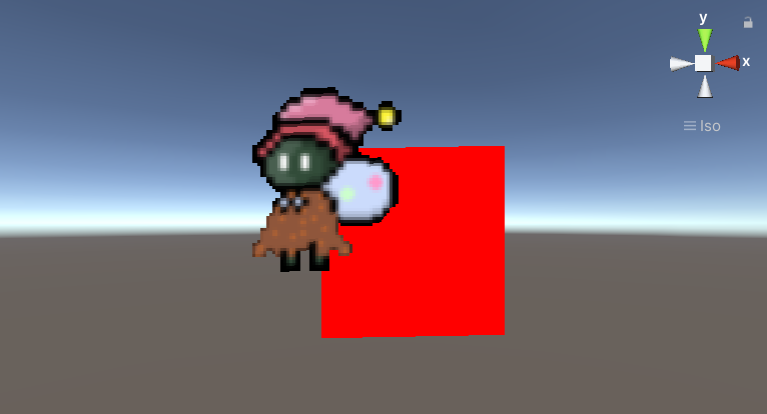
前回までは不透明なテクスチャを使っていたので、今回からは部分的に透明なテクスチャを表示します。

▼ 前回の記事
全文
Shader "Custom/Transparent"
{
    Properties
    {
        _MainTex("Texture", 2D) = "white" {}
    }

    SubShader
    {
        Tags
        {
            "Queue" = "AlphaTest"
            "RenderType" = "AlphaTest"
        }

        Pass
        {
            CGPROGRAM

            #pragma vertex vert
            #pragma fragment frag

            #include "UnityCG.cginc"

            struct appdata
            {
                float4 vertex : POSITION;
                float2 uv : TEXCOORD;
            };

            struct v2f
            {
                float4 vertex : SV_POSITION;
                float2 uv : TEXCOORD;
            };

            sampler2D _MainTex;

            v2f vert(appdata v)
            {
                v2f o;
                o.vertex = UnityObjectToClipPos(v.vertex);
                o.uv = v.uv;
                return o;
            }

            fixed4 frag(v2f i) : SV_Target
            {
                fixed4 color = tex2D(_MainTex, i.uv);

                if (color.a <= 0) {
                    discard;    //画素を塗りつぶさない。ZBufferの更新も行わない
                }

                return color;
            }

            ENDCG
        }
    }
}
フラグメントシェーダー
           fixed4 frag(v2f i) : SV_Target
            {
                fixed4 color = tex2D(_MainTex, i.uv);

                if (color.a <= 0) {
                    discard;    //画素を塗りつぶさない。ZBufferの更新も行わない
                }

                return color;
            }
画像の中で透明な画素は当然、tex2Dで取得した色のアルファ値が0になっているはずなので、
0だったら、何もしないようにする。
discard
画素を塗りつぶさない。ZBufferの更新も行われないので、奥に重なったオブジェクトがある場合は、
そのオブジェクトの色がそのまま描画される。
clip
if文をかかずにclipを使うこともできる。
           fixed4 frag(v2f i) : SV_Target
            {
                fixed4 color = tex2D(_MainTex, i.uv);
                clip(color.a - 0.1);
                return color;
            }
引数の値が0未満の場合に discard と同じように塗りつぶしを行わない。